
Adding and managing portfolio items with Kalium is easy and fun, with its multiple portfolio types, each portfolio item has their own specifics and customizations can be done while creating/editing it. Before starting make sure you have followed the instructions on how to create a portfolio page, and check if you have installed and activated the Portfolio Post Type plugin.
Adding portfolio items
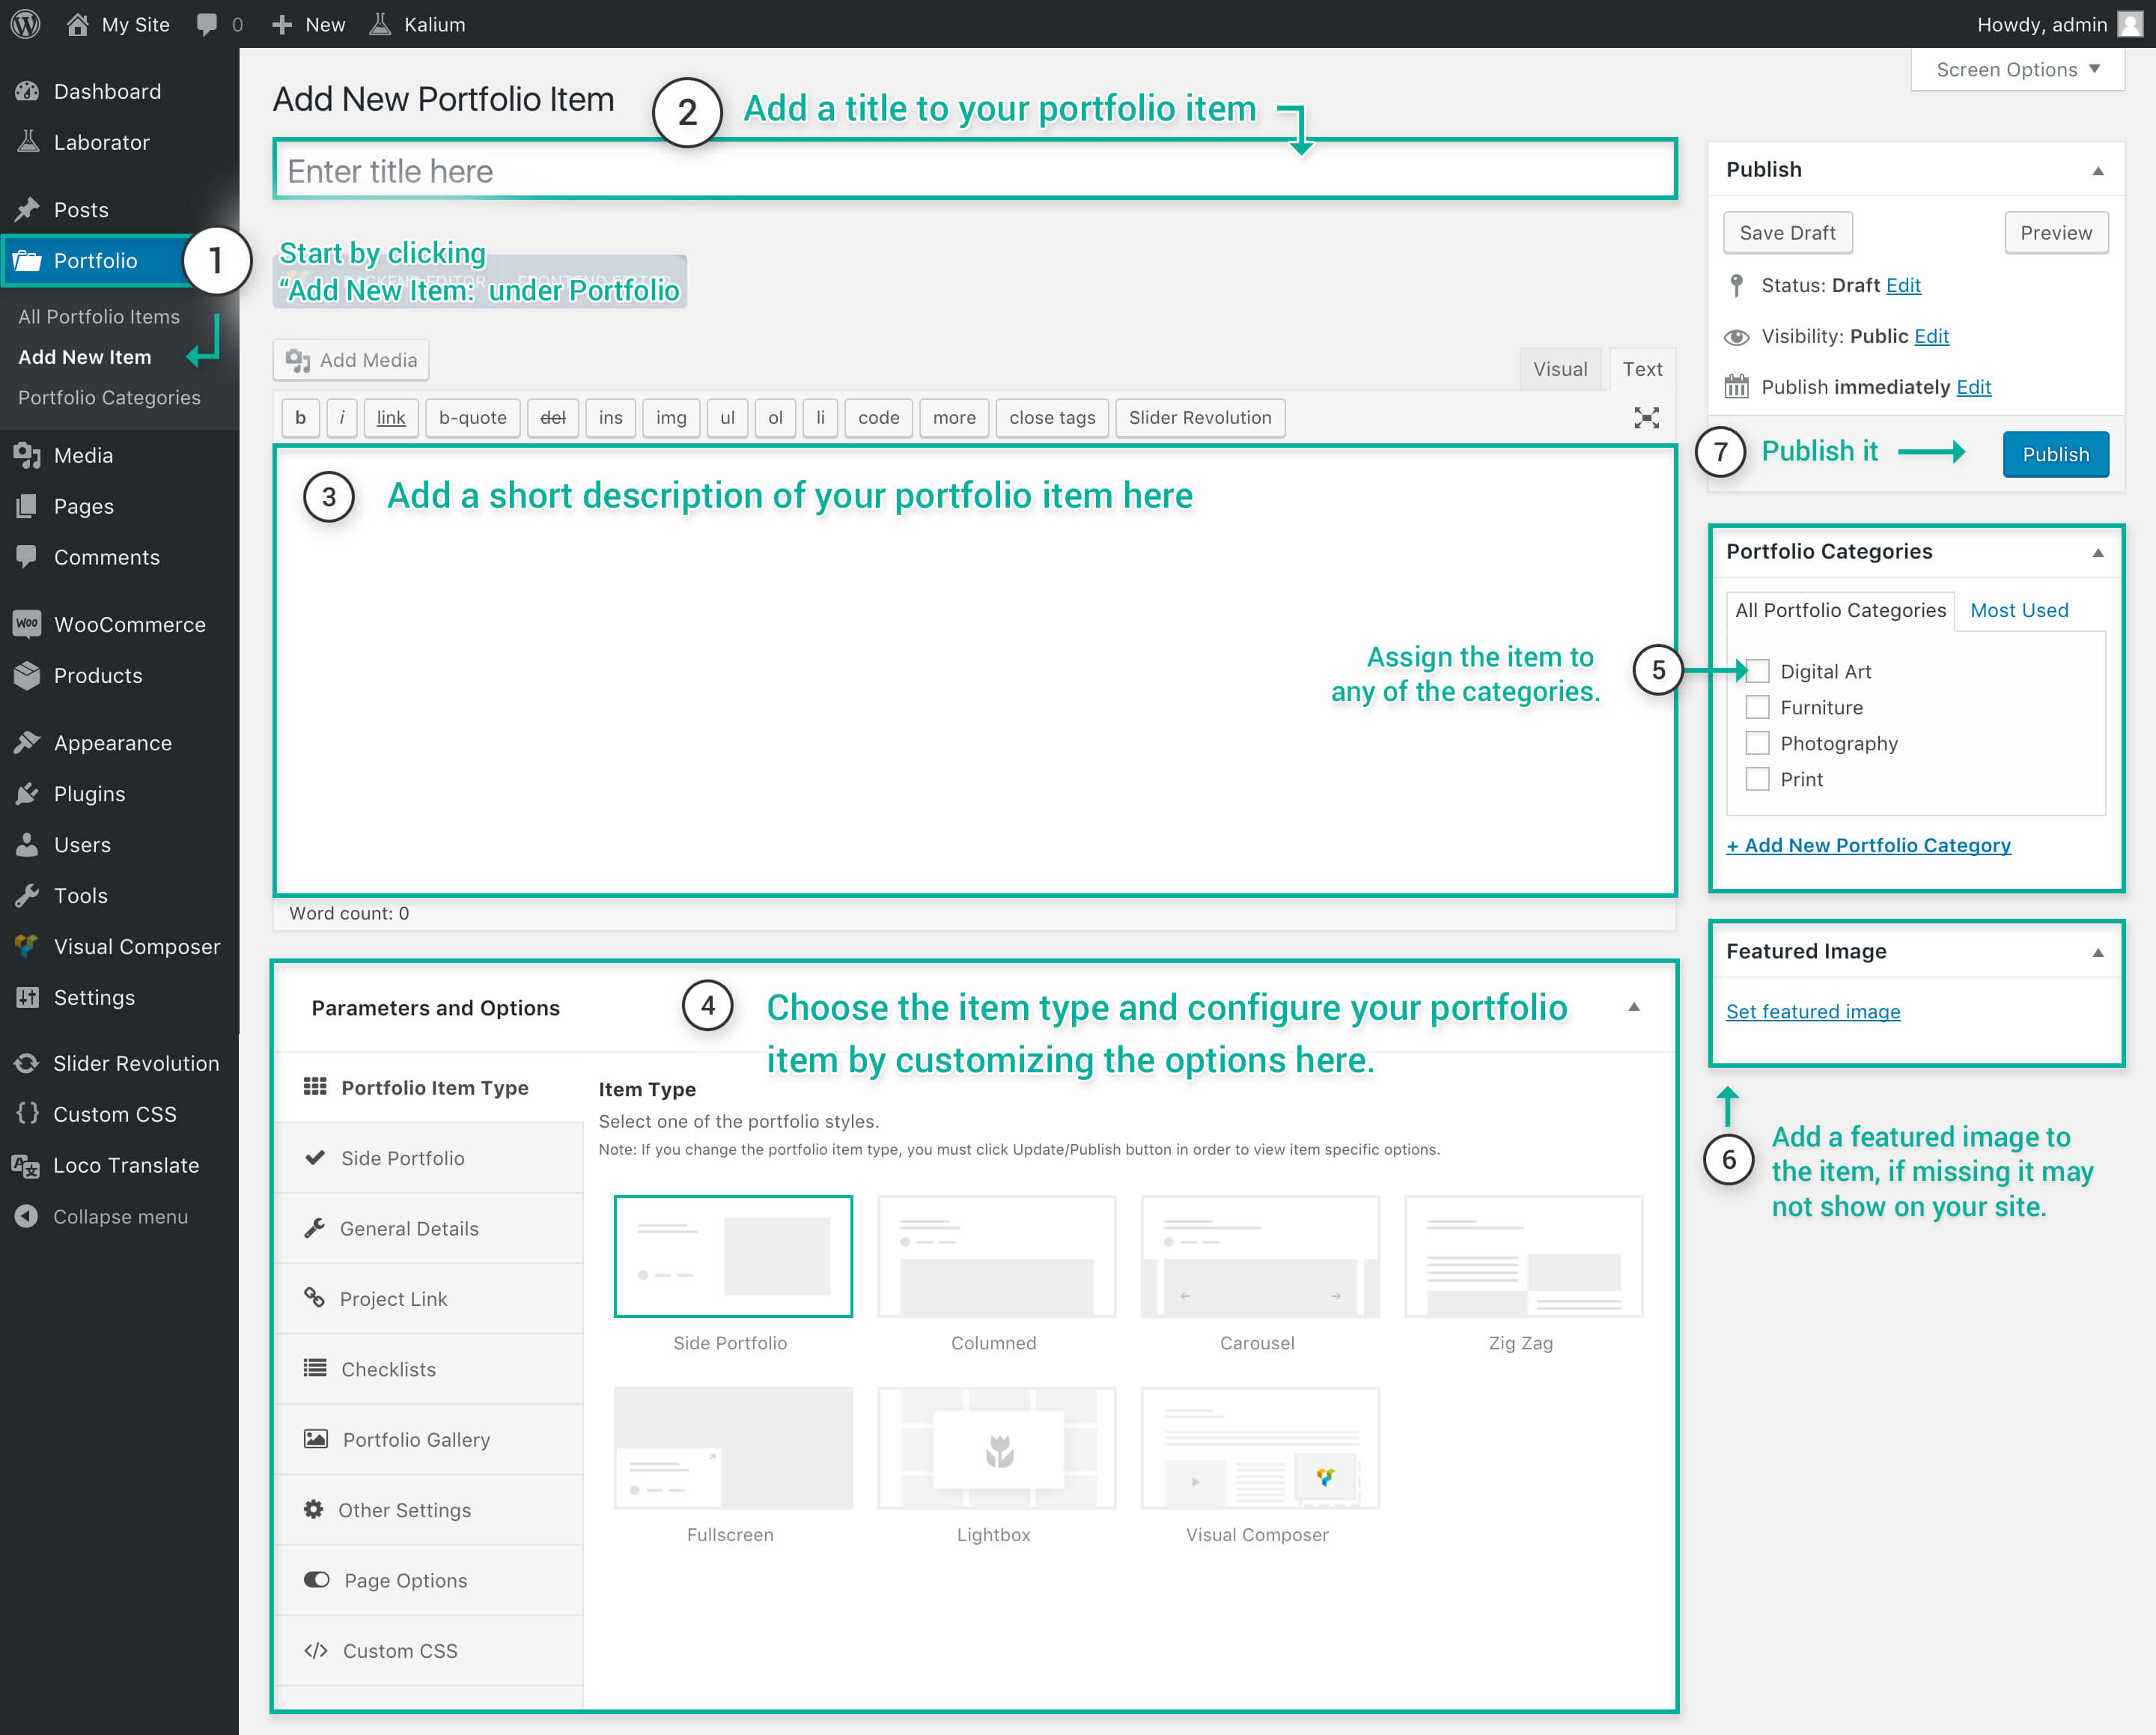
Creating a portfolio item is illustrated in the image above, anyway we will teach you how you can create a portfolio item in a few steps. Let’s start creating your first portfolio item:
- On your admin dashboard go to Portfolio and click the Add New Item that’s below the Portfolio.
- Now that the new page loaded, on the Enter title here add a title for your item.
- Continue by adding a description to your item.
- Under the Parameters and Options select any of our Portfolio Item Types as documented below.
- On the right sidebar under the Portfolio Categories, assign your item to any of the categories.
- Choose an image you want to be the cover of your portfolio item by selecting it in the Featured Image.
- You’re ready to go, let’s see the portfolio item live by clicking on Publish.
Portfolio Parameters and Options
Each page, post and portfolio item have their own basic options so you can independently set header, footer and page settings from there. The options here are valid for this portfolio item only, if you don’t change anything they will be inherited from the Theme Options. Like for the page and post the Parameters and Options are valid for portfolio items too, the options and features will be explained in this tutorial, to access them simply scroll down on the portfolio item you’re adding or editing.
Sometimes you may not see them, so make sure the options are not collapsed, to expand them simply click on the top right caret and see if the Advanced Custom Fields PRO (ACF) plugin is installed.
Portfolio Item Types
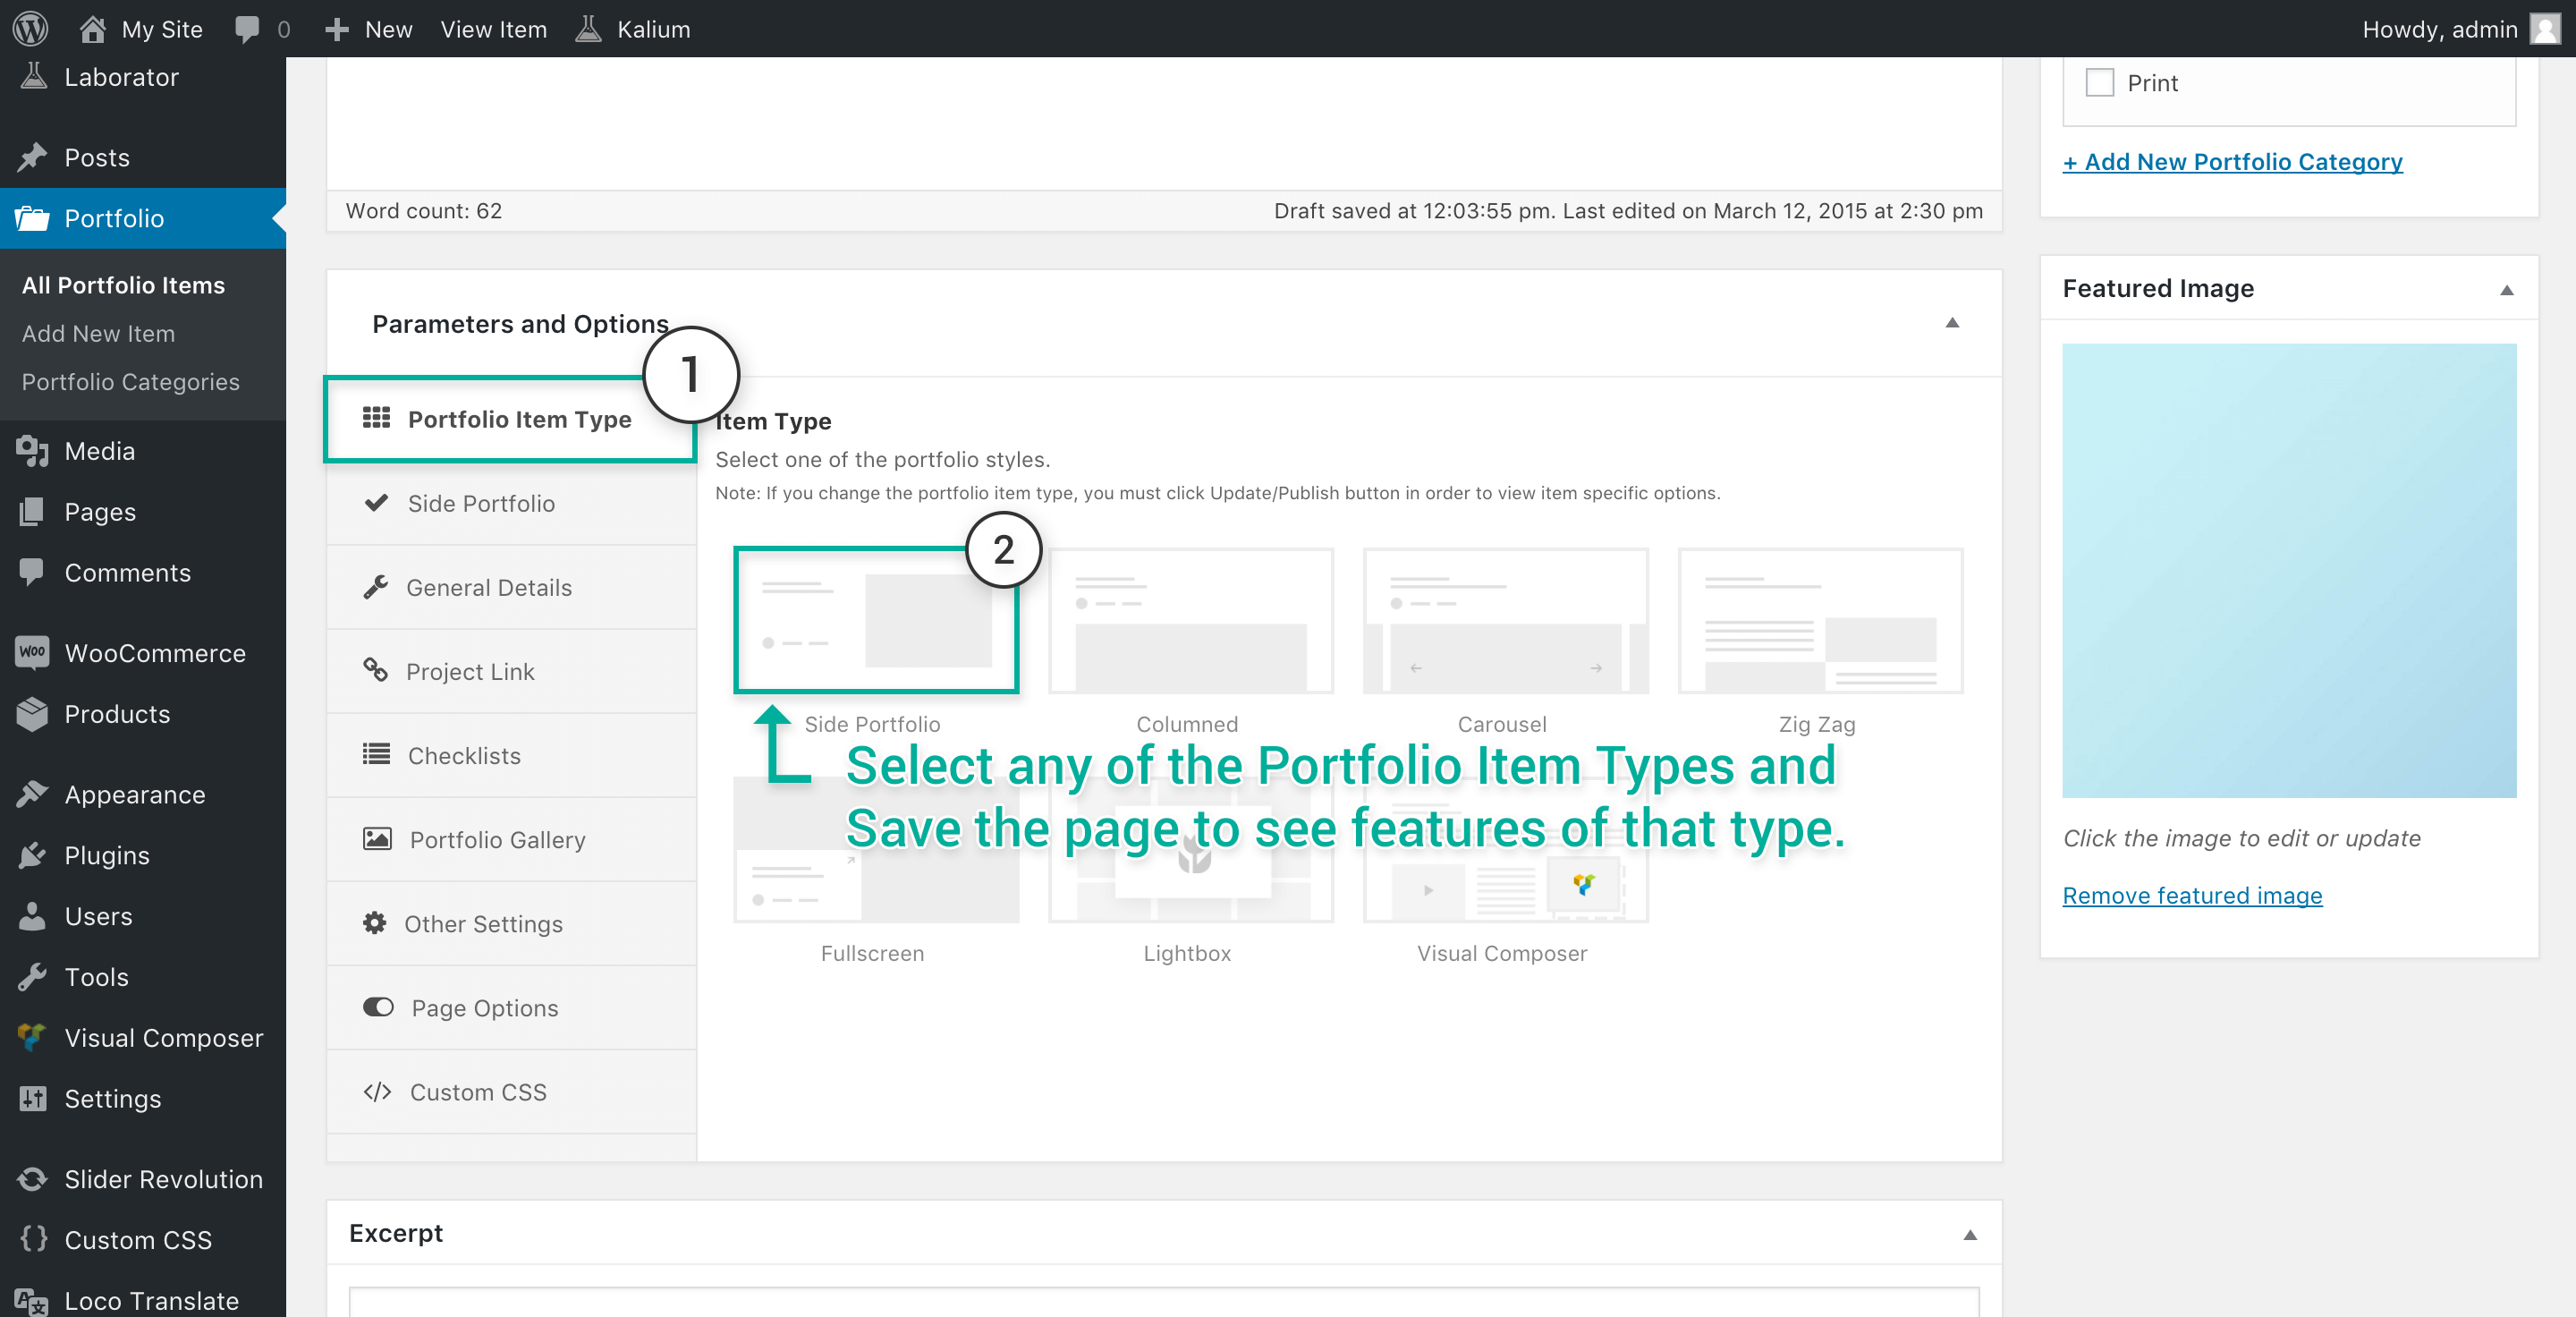
Kalium has 7 main portfolio item types, while if you count their features alone they can be ungrouped to tens of portfolio items, they are:
- Side Portfolio — Creating a side portfolio item.
- Columned — Creating a columned portfolio item.
- Carousel — Creating a carousel portfolio item.
- Zig Zag — Creating a zig zag portfolio item.
- Fullscreen — Creating a fullscreen portfolio item.
- Lightbox — Creating a lightbox portfolio item.
- Visual Composer — Creating a Visual Composer portfolio item.
To create your portfolio item you will need to select any of these types, as explained in the image above then continue adding information and images to it through the tabs on the left, explained below.
General Settings
More options for your item can be set from here, there are two main tabs and they are explained below.
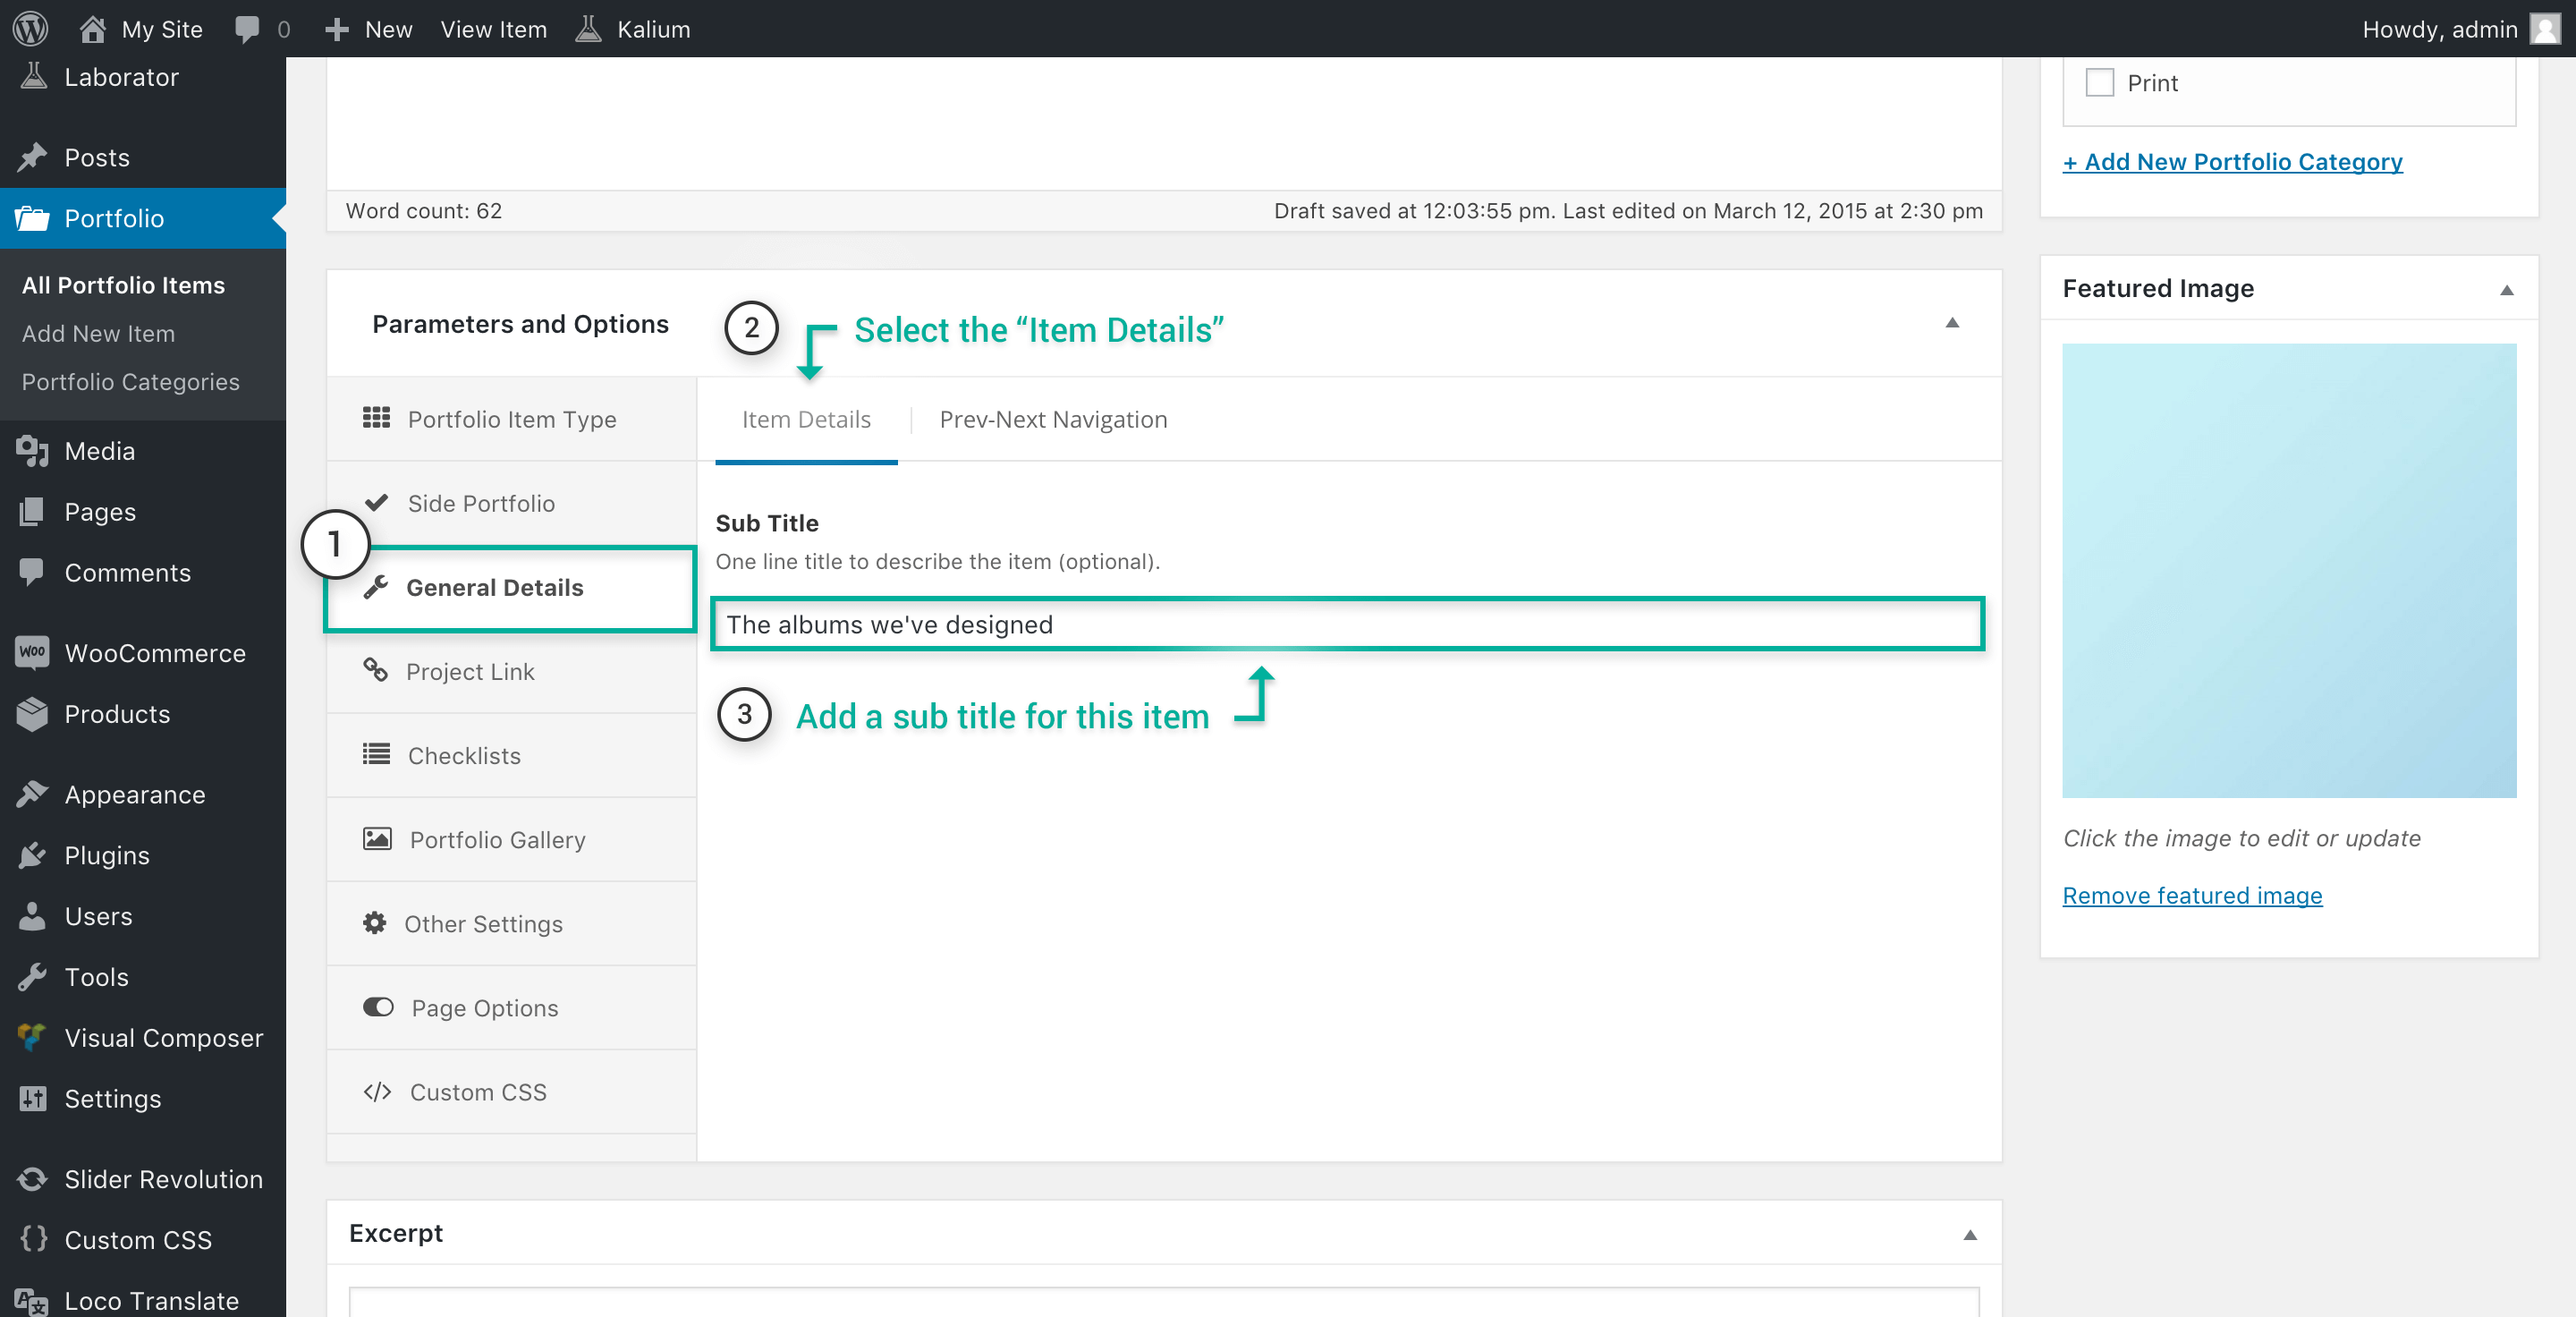
Item Details
This tab is used only for adding a Sub title to your item, the sub title will help you add a slogan of that item or a short one line description of the job, it can be left blank if you don’t want to add it.
Adding a sub title is easy, just make sure you’re on the General Settings and then in Item Details tab, there you can add a sub title, see the image tutorial below:
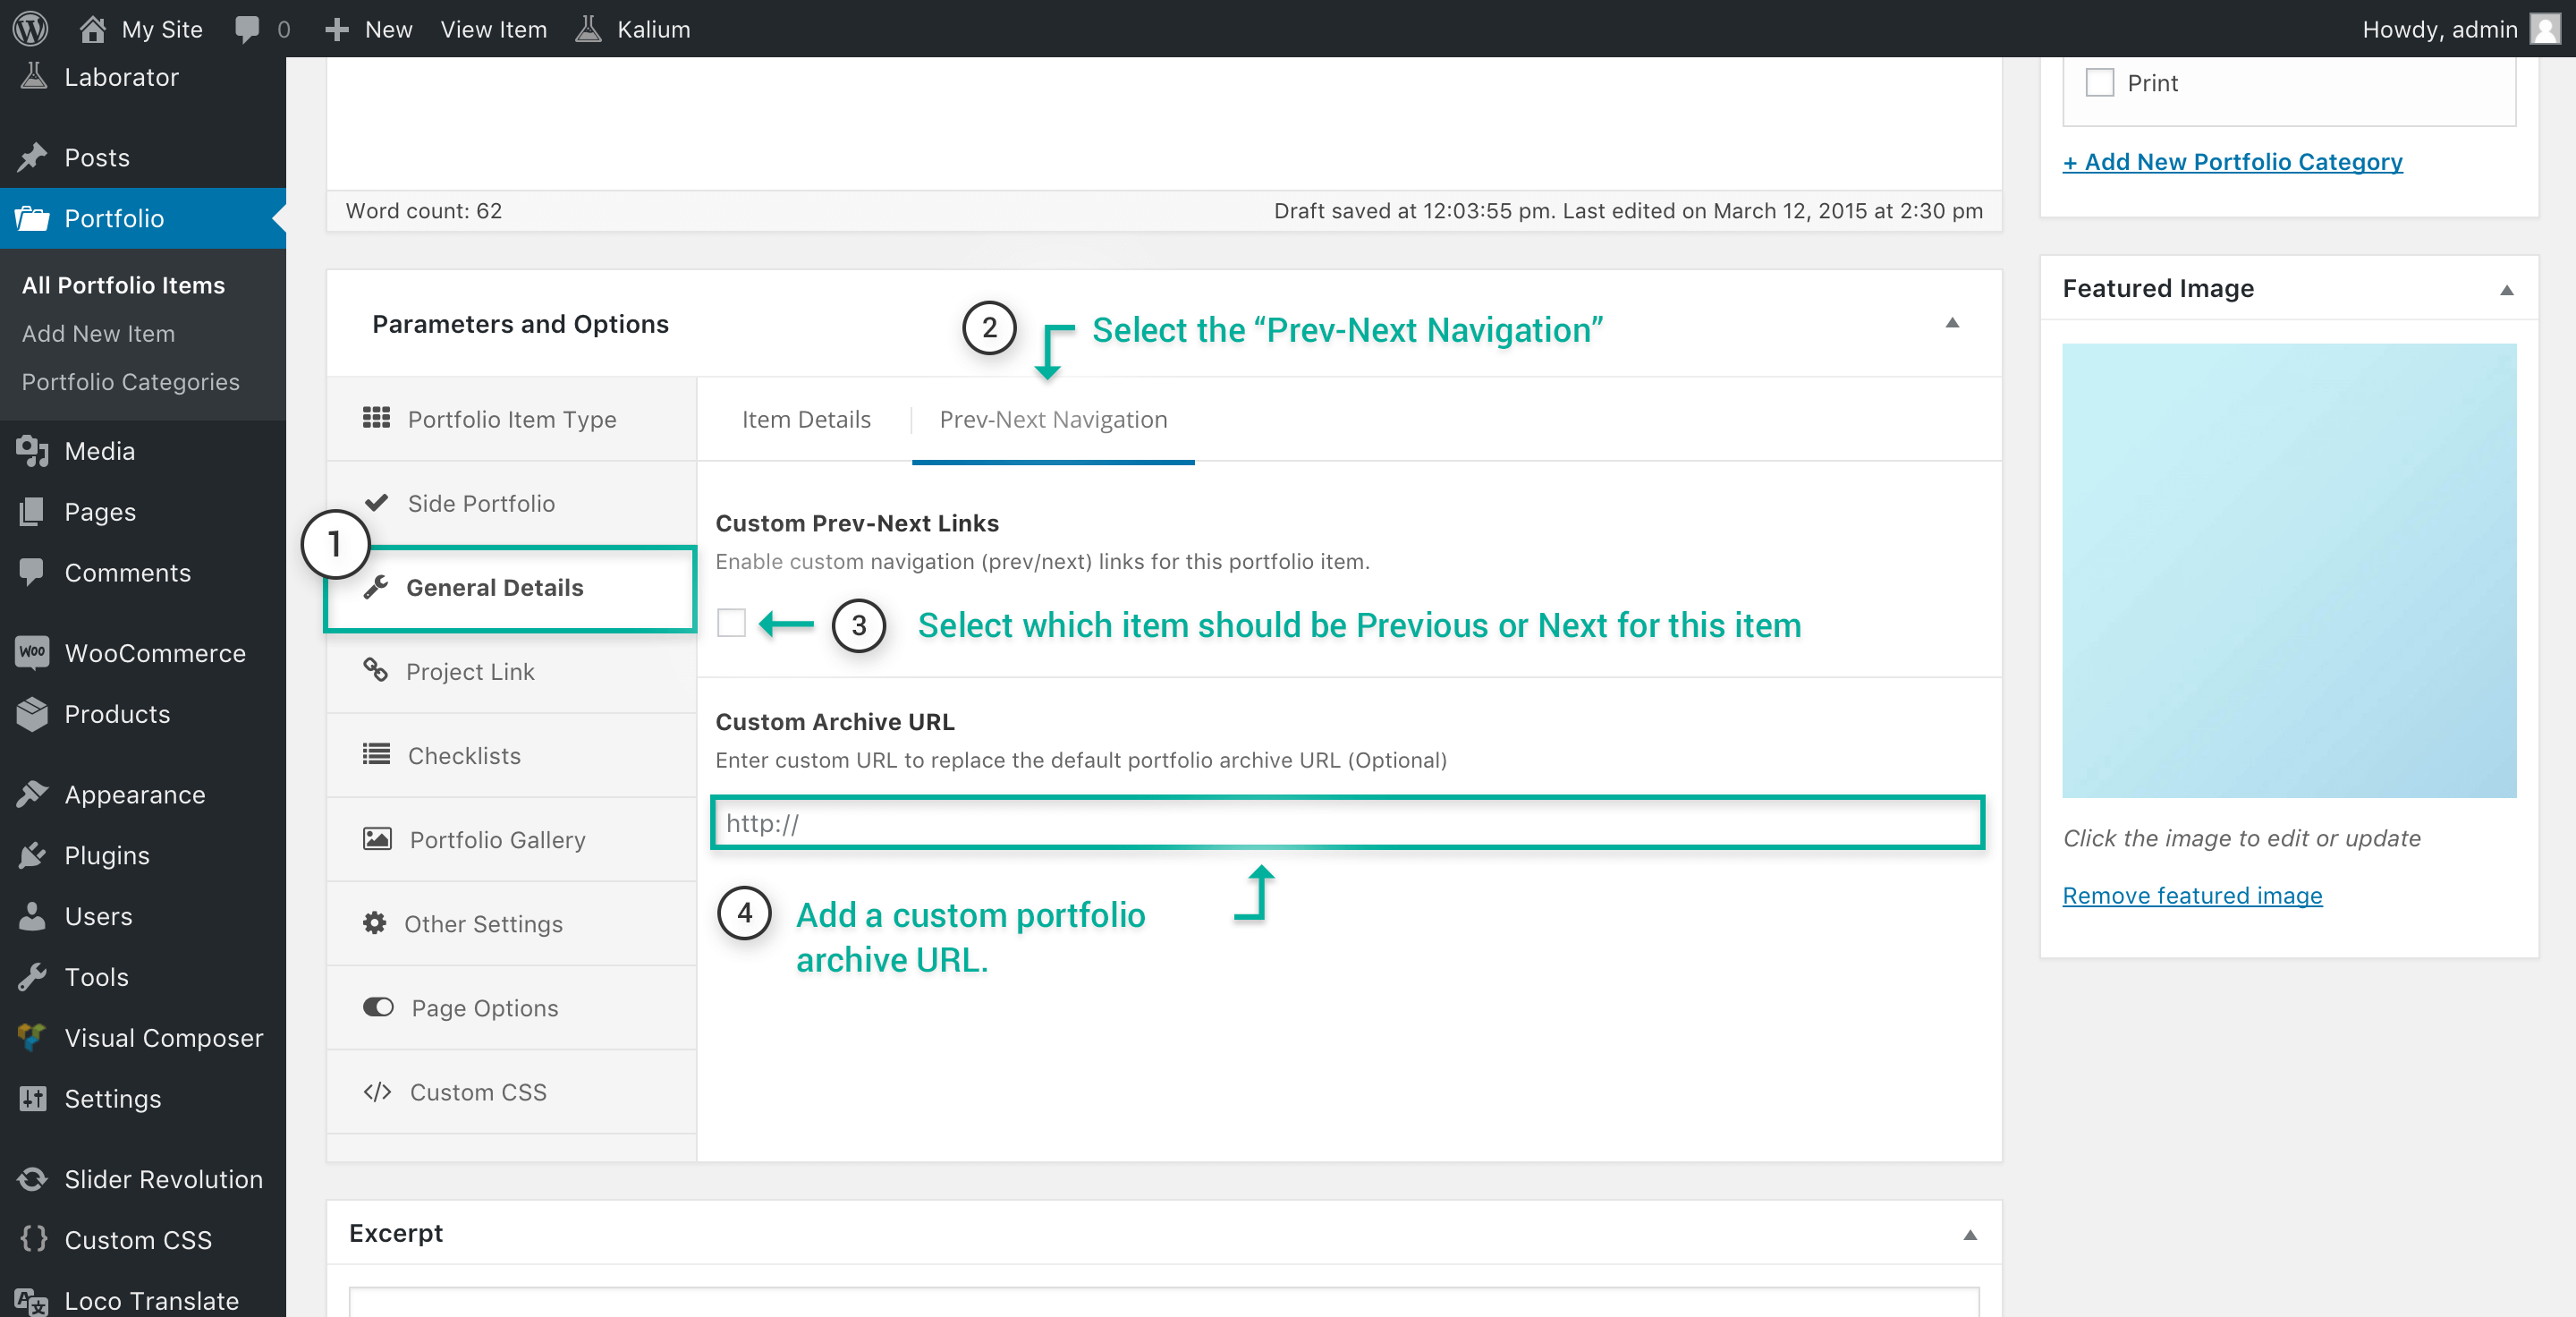
Prev-Next Navigation
Through this option you will be able to add a custom portfolio archive URL link valid only to this item. You can also select which item to be previous and next for this item, if you want to do this simply click on the Custom Prev-Next Links or simply follow our image below:
Project Link
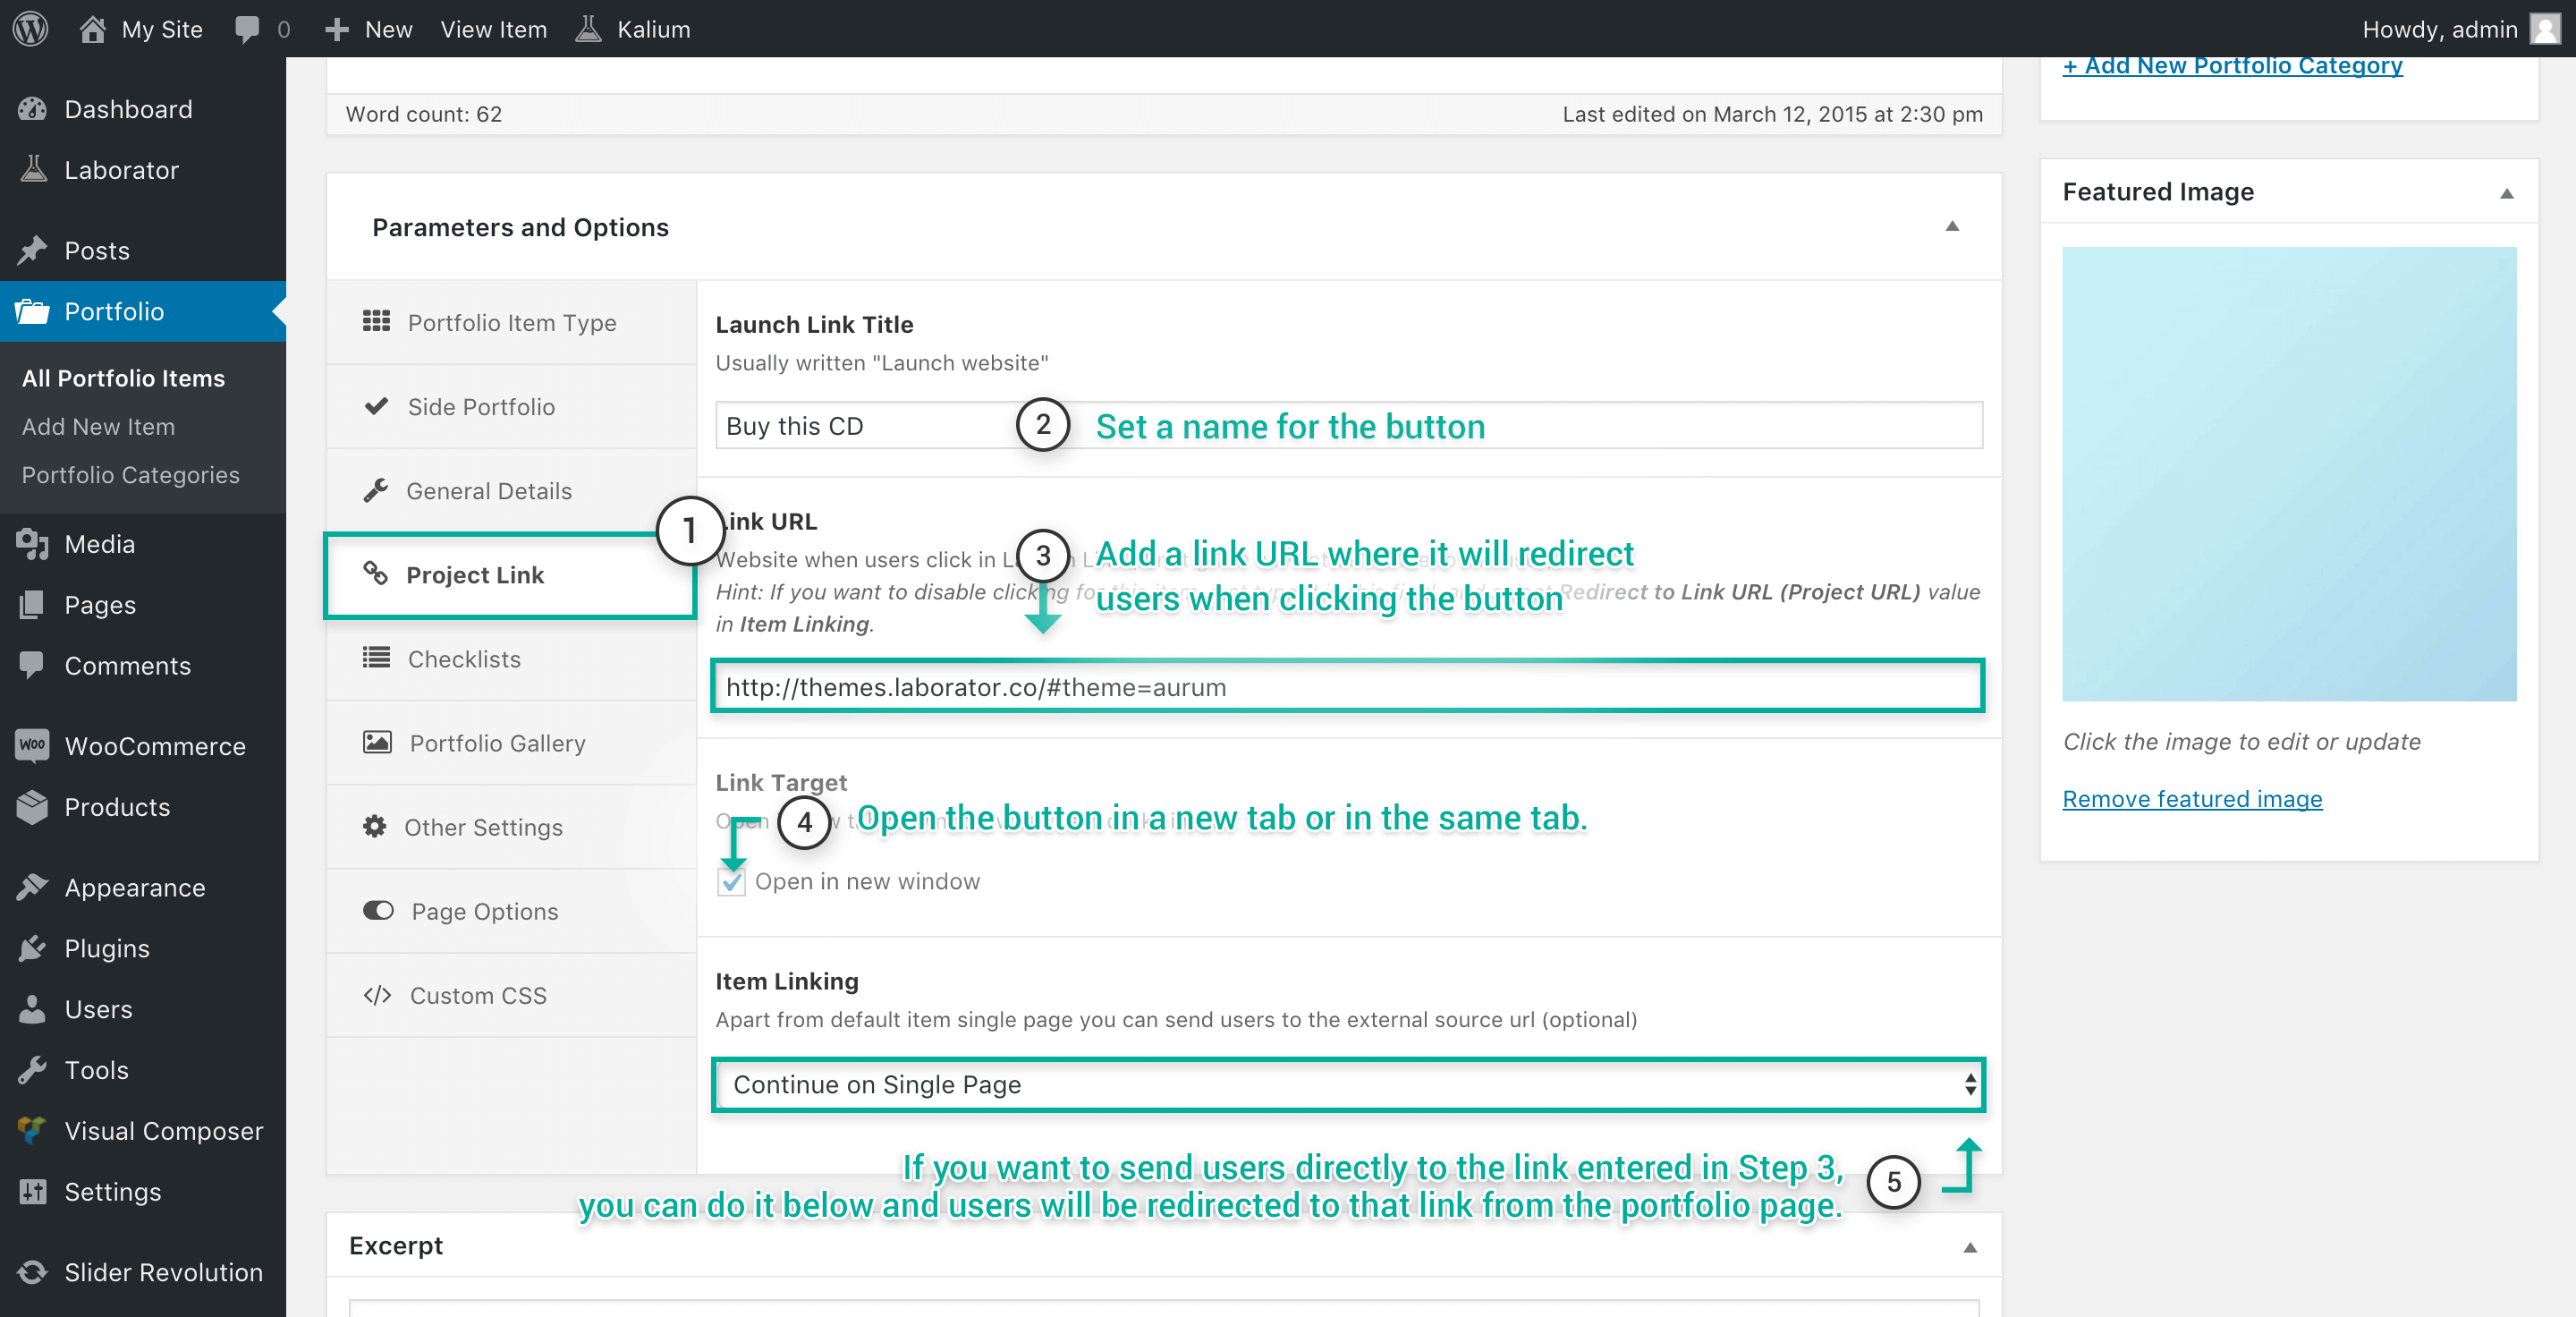
For each item you can set an action button and link the project with the link you provide here, also you will be able to add a custom external link to your item, this way visitors will be redirected to the link you’ve entered here to do this simply make sure you’re editing on the Project Link tab.
- Launch Link Title — Set the title of the button/link you want to add.
- Link URL — Add the URL where you want to redirect users when the button is clicked.
- Link Target — Ticking it will open the link on a new tab/window.
- Item Linking — Select if you want to send users to the link you’ve entered above, this will not allow them to see the portfolio item but will redirect them immediately.
Checklists
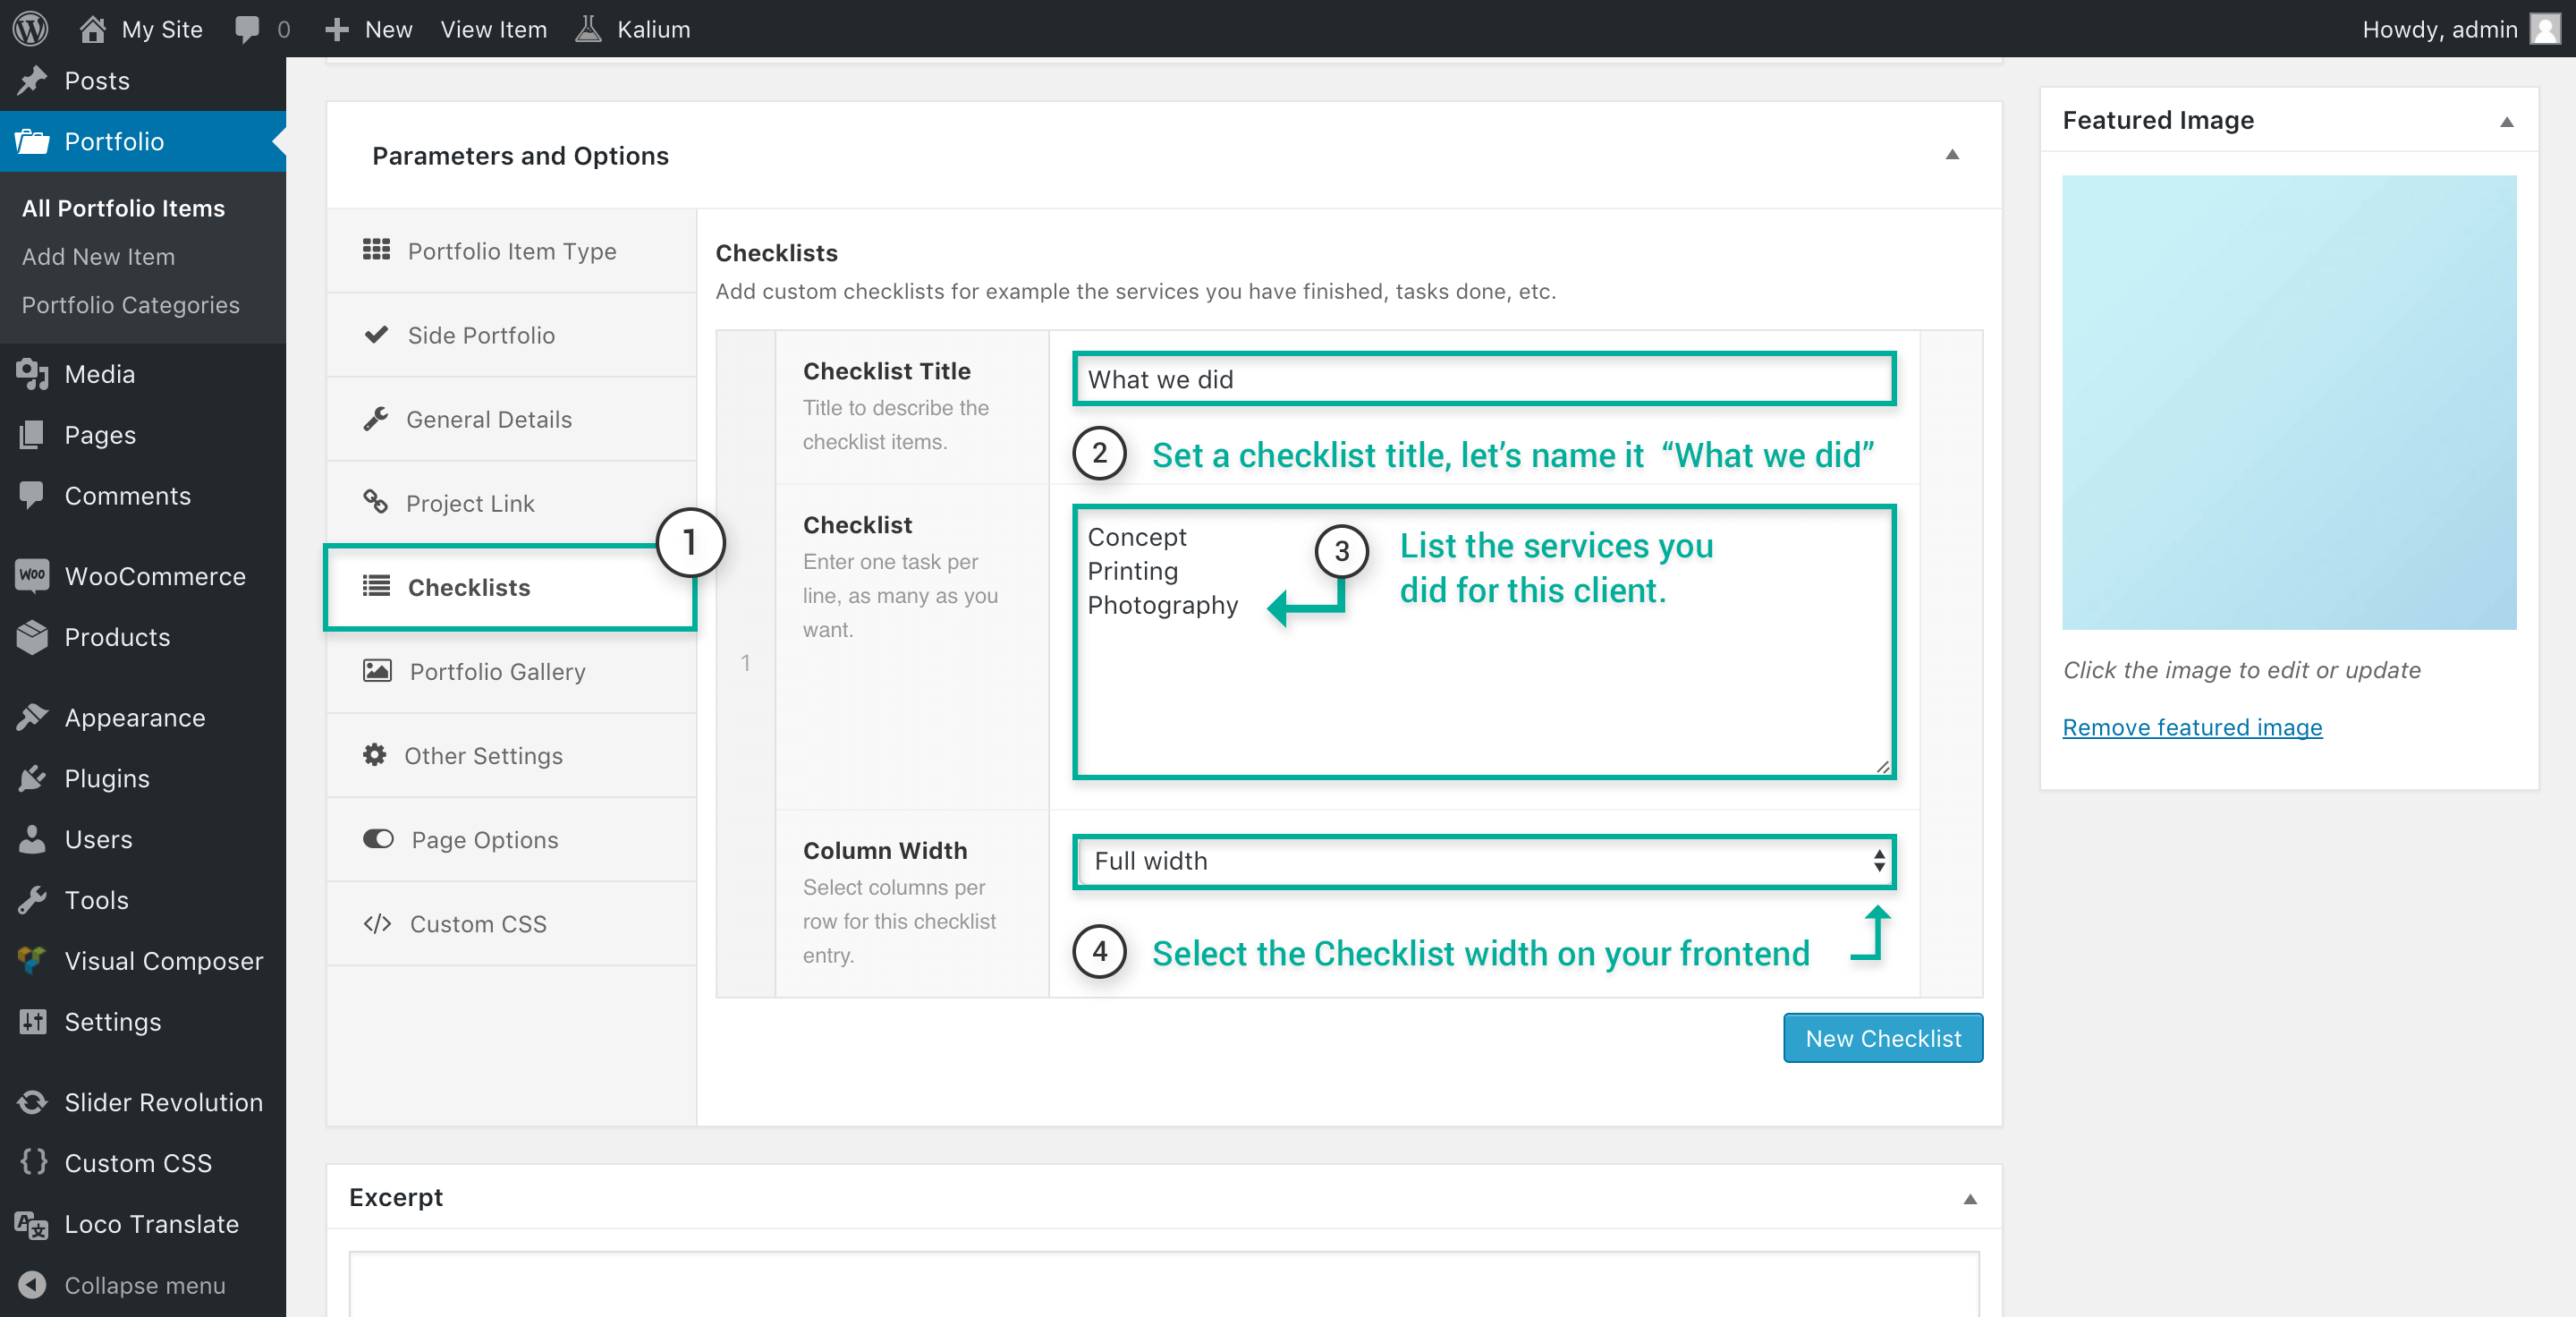
Using the checklist you can list the tasks and services you’ve done for that client, you can add more than one checklist and to add it is really simple like that:
- Make sure you’re on the Checklists tab on the Parameters and Options.
- Click on the New Checklist to add a new checklist, now that it has been added fill the forms below.
- Checklist Title is used for the title of that checklist, we’ve named it “What we did”
- Add the services, tasks or whatever in Checklist text area, type them on a new line.
- Select whether you want them to show Full width on a single row, or split with the item description by selecting 50% in the Column Width area.
Portfolio Gallery
Here you will have to add the images of the portfolio items, each item has it’s own specifics so follow the instructions based on which portfolio item type you’ve chosen above.
Other Settings

Through these settings you will be able to overwrite the hover styles set in Theme Options, so if you want a custom color or style for your item you can do it from here, we’ve tried to explain them on the image above and but let’s see what we can do with them:
- Custom Hover Background Color — Set the background color on mouseover for this portfolio type.
- Hover Effect Style — Select the style when you mouseover the thumbnail, options are No hover effect, Full background hover and Distanced background hover.
- Hover Color Transparency — Apply a light transparency for the hover effect or leave it blank without transparency.
- Hover Layer Options — Select whether you want to have the hover always active, only on hover or reverse it.
|
|
|
|

Custom CSS
This part does the same thing as the main Custom CSS, but it’s applied only for this portfolio item only.